I'm back. I know it's been a couple weeks since I posted, so I wanted to go all out today and write a tutorial. Last term at school, I was working on networking in Unity3D. There are some really good tutorials out there on creating an authoritative server, client-side prediction, and entity interpolation, but there was nothing on server reconciliation; which is also important. Mostly when I searched for some help on this subject, all I got was bank reconciliation, which is not very helpful in this case.
Luckily, I did figure out how to do server reconciliation in Unity3D, and now I want to share what I learned with everyone. I've never written a tutorial before, so hopefully I can explain myself well.
Okay, so let's get started. I'm going to assume that you have already set up an authoritative server for player movement, because as I mentioned earlier, there are lots of good tutorials out there on that.
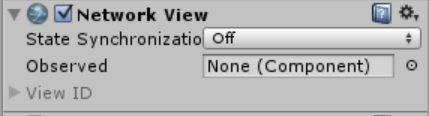
First things first, you need to have a network view attached to your object(in my case I have a cube that is a pre-fab). This is really important, since we are going to be working in an OnSerializeNetworkView function. Make sure to have the state synchronization set to off and the observed set to none. It should look something like this in the inspector:
Now, why did I set it up like this? Well, because I've used RPC calls instead and I'm not directly sending data over the network. This can change based on how you've set up your server, but if it's authoritative, chances are that you've probably been using RPC calls to send data over the network.
Now let's get to the fun part: coding! I'll be using C# for this tutorial, since that's what I usually program in when using Unity3D.
One more thing: I already had client-side prediction and entity interpolation set up before I started working on server reconciliation.
So let's create a new script, called NetState, but don't attach it to anything. This script is just for setting up a class so that the client-side prediction and entity interpolation as well as server reconciliation will work properly.
public class NetState : MonoBehaviour {Here you can see that we set up some public variables and a constructor. Make sure that you make time a double type variable, otherwise it won't work. This stuff is to set up time, position, and rotation. Pretty self explanatory, I think. Note: I got the code for this script from another tutorial on client-side prediction and entity interpolation, which can be found here: http://playblack.net/zee-code/unity-3d-authoritative-server-networking-pt3. This is a really good tutorial, however, it's in JavaScript, so some of the code is a little different.
public double timestamp;
public Vector3 pos;
public Quaternion rot;
NetState(){
timestamp = 0.0f;
pos = Vector3.zero;
rot = Quaternion.identity;
}
public NetState(double time, Vector3 pos, Quaternion rot){
timestamp = time;
this.pos = pos;
this.rot = rot;
}
}
Now let's work on actually setting up some server reconciliation.
Create a new script and attach it to your object/pre-fab. I called it "Predictor" because I also did client-side prediction and entity interpolation in this script. I think it makes it a little easier that way.
At the top just under the using System.collections, put in
[Require Component (typeof(NetworkView))];This ensures that the NetworkView attached to the pre-fab will work with this script.
This is the part where we set up some variables. Make the following variables:
public Transform observedTransform;
public authoritativeCube receiver;
private NetState[] serverStateBuffer = new NetState[20];The observedTransform variable seems pretty obvious: it's the transform observed by the network. Now, I know that we've set the observed to none, but stay with me here, it's going still be useful. In the inspector in the Unity editor, select the ObservedTransform variable. When the pop-up appears that will allow you to attach an object to this variable, select your pre-fab. Now, head back into your code.
The receiver variable is of the type that your authoritative player movement script is called. You don't have to have it as type authoritativeCube, that's just what I've called my authoritative player movement script.
The last variable is of type NetState, which we set up earlier with that class we made. It's an array with 20 states that have been sent to the server. This variable is very important because it will be used not only for server reconciliation, but also for entity interpolation. This will help the player movement to look a lot smoother.
Now let's move on to the OnSerializeNetworkView function. This function is used to determine what objects are sending and receiving data, in this case the server and the clients. So now, type in:
public void OnSerializeNetworkView(BitStream stream, NetworkMessageInfo info)Since this is a function, don't forget the curly braces.
We have to make some variables for this function. We need to make a position and a rotation. Let's do that now. Make the following variables:
Vector3 pos = observedTransform.position;These will keep track of the position and rotation of the transform.
Quaternion rot = observedTransform.rotation;
Let's go ahead and check the state of the stream that's happening. We do this by using an if statement.
Type in the following code:
if (stream.isWriting) {What is all this code doing? Well, if the stream is writing, then the position and rotation of the observed transform has been put into the stream. If the stream is reading, then in this case it's updating the local client prediction correction(this is the receiver.LerpToTarget () part. This function is also from the same tutorial linked to above. It's used for client-side prediction. If you already have client-side prediction in your code, don't worry about it. If you want to use it, head over to the link that I posted and check it out), and it's updating the server state buffer so that the latest position is the first element in the array.
stream.Serialize ( ref pos);
stream.Serialize (ref rot);
} else {
stream.Serialize (ref pos);
stream.Serialize (ref rot);
receiver.serverPos = pos;
receiver.serverRot = rot;
receiver.LerpToTarget ();
for(int i = serverStateBuffer.Length - 1; i >= 1; i--){
serverStateBuffer[i] = serverStateBuffer[i - 1];
}
serverStateBuffer[0] = new NetState(info.timestamp, pos, rot);
}
Now all of the groundwork is laid. The really cool part will be finding and storing the relative position of the client to the server, giving each key press a unique identifier, and updating the position of the player if the unique identifiers don't match.
Let's get the relative position now. In the OnSerializeNetworkView function, put this variable in with the others we created:
Vector3 relativePos = observedTransform.position - transform.position;There is a bit of special relativity physics going on here, since we are storing the relative position of the transform. I think that's pretty neat.
Next, we have to create unique identifiers for every key press the client makes. At the top of the script, under using System.collections; type in using System;. We need this library for what we are going to do next.
This is where it starts to get weird, but stay with me, it will pay off.
Remember where you put the observedTransform and receiver variables? Underneath those create a new variable:
public string id = Guid.NewGuid().ToString ();This is how we create a unique identifier. A Guid stands for Globably Unique Identifier. We also used the ToString() method to convert the identifier to a string. It just makes things a lot easier.
Head back into the OnSerializeNetworkView function. In the for loop with the serverStateBuffer array in it, put the following code underneath what you've already typed in:
id += serverStateBuffer[i].ToString ();This is how we assign a unique identifier to every state that the player is in. A for loop is really the best option for that.
The next thing to do is to implement what we just did to make this server reconciliation actually work.
Stay inside the else statement in the OnSerializeNetworkView function. Underneath the first for loop create another by adding this code:
for(int k = serverStateBuffer.Length; k >= 1; k++){What's going on here? We are basically checking to see if the identifiers that we assigned earlier match one another. If they don't, then serialize the relative position of the client to update the position.
if(id != serverStateBuffer[k].ToString ()){
stream.Serialize (ref relativePos);
}
}
Guess what? We're all done! That's how server reconciliation can be accomplished. This is only one way of doing it, so don't take this as the bible on it or anything. This tutorial is just that: it's meant as a guide. Hopefully this will help you if you are having trouble with server reconciliation in Unity3D.
If you have any questions feel free to comment below. I'm also on Twitter @GalacticGirlx2.
Until next time.
Peace out.
No comments:
Post a Comment